Miyoo Mini V3 20221216 or 20221224 Firmware Specific Guide for Onion OS
This wiki comes with 20221216 or 20221224 firmware specific instructions for the Miyoo Mini V3 journey that I personally went thru.
Backup your official Miyoo SD Card
It's not mentioned on the OnionOS GitHub Installation Guide, but you should back up your official Miyoo SD Card. I just copied all the contents to my PC. It contains BIOS files and the ROMs. The BIOS being more important.
If you want to be extra safe you can make an image of the stock Miyoo MicroSD Card w/ a program called WIN32DiskImager on Windows.
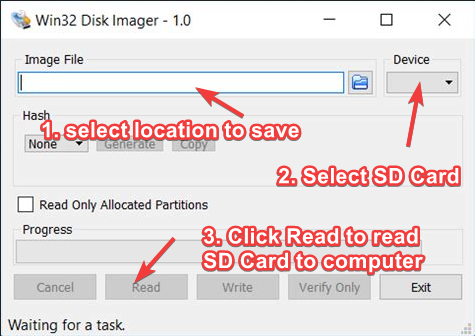
On WIN32DiskImager I plugged in the Official SD Card into my Windows computer. Selected a location to save to. Then clicked "Read" to read the SD card image into my computer.
A. How to Use Higher Capacity MicroSD Cards on Miyoo V3
Skip this step if you're not using a microSD card bigger than 32GB. If you have a card higher than 32GB you'll have to format your higher capacity card in FAT32. I did this with Rufus in Windows. Video below shows you how to format.
B. Follow Onion OS Official Documentation
I followed the "Installing (on an empty SD card)" instructions since I wanted to use my bigger 256GB Samsung MicroSD card.
Official Onion OS GitHub Repository: https://github.com/OnionUI/Onion/wiki/Installation
Only install Onion OS v.4.0.4 or later for firmware versions starting with 20221216 or 20221224. If you don't you may encounter soft brick and have to recover w/ I2C methods. As long as you downloaded 4.0.4 or later you should be safe.
You can reference this section if you are having trouble w/ the folder mappings in Step 3 of the official doc.
C. Upgrade Firmware from 20221216/2022124 to Hotfix Firmware
I was able to proceed w/ this step after "Step 2: Copy the installation files and boot up your device to begin the installation", but you can also do it after Step 3.
This is an important upgrade for our specific units running firmware 20221216XXXX or 20221224XXXX. Do not use this upgrade from any other firmware versions.
Why it is important?
* Reduces the startup time from 20s to 12s.
* Allows system settings to persist after reboot (this is only an issue on 20221216).
As of December 2022 Miyoo was no longer able to source the internal flash chip they were using so they sourced a new chip very similar in functionality, but they didn't immediately receive the additional drivers needed to enable full write functionality with this new chip. This is why the hotfix is solves the two issues above. Learn more here.
If you want to follow the discussion thread it is here: https://www.reddit.com/r/MiyooMini/comments/104qbak/community_firmware_patch_for_new_devices/?sort=new
The actual firmware is downloaded here (make sure you dl the zip called "Firmware patch 20230104 (only for new devices).zip" not the other ones): https://drive.google.com/drive/folders/1OvmkKEtSMEWv1RY8LPsbDk0ylWzOg_7j?usp=sharing
Official Instructions Below
Notes: Don't be like me and use a USB-C to USB-C cable w/ PD. It only worked w/ a USB-A to USB- C Cable. It's important that you follow all the steps, but especially "Step #3 Delete the firmware file".
Step 1 - Transfer the file
--------------------------

Copy the firmware image (miyoo283_fw.img) to the root of the SD card.


Step 2 - Flash the firmware
---------------------------

IMPORTANT: Do not power off device when upgrade starts

1. Make sure the device is off.

2. Insert the SD card into the device.

3. Insert the charging cable.
   - Do not press the POWER button.
   - It will power on and do the firmware upgrade automatically.

4. Wait for the upgrade to finish (about 2 minutes).

5. Unplug the charging cable when the charging screen appears.
   - Some devices will show "FINAL GATE / UNLOCKED", this is just a themed charging screen.
   - If you wait too long the screen will be off, it is still save to unplug then.
   - After removing the cable, wait for the device to power off.


Step 3 - Delete the firmware file
---------------------------------

IMPORTANT: Delete the firmware file from the SD card after the upgrade!


Notes on charging
-----------------

Use a known good USB-A to C charger.
Now you should be done with your Miyoo. The rest of the topics below are optional.
Optional: Miyoo to OnionOS Rom Folder Mappings
This mapping list was determined from this source: https://github.com/OnionUI/Onion/wiki/Emulators
It's for Step 3 of https://github.com/OnionUI/Onion/wiki/Installation#step-3-copy-over-your-bios-and-rom-files
This is WIP and may not be 100% correct. You can DM me on reddit if you have any inputs. https://www.reddit.com/user/Frozutek/
From https://github.com/OnionUI/Onion/wiki/Emulators#rom-files
The roms on the included Miyoo Mini SD Card are a mixed bag which can lead to incompatibility with some emulators. It is highly recommended to source your own roms to get the most out of the device.
|
Original Miyoo SD Card |
Onions OS SD Card |
|
\Roms\ARCADE\cps1 |
\Roms\CPS1 |
|
\Roms\ARCADE\cps2 |
\Roms\CPS2 |
|
\Roms\ARCADE\cps3 |
\Roms\CPS3 |
|
\Roms\ARCADE\pgm |
\Roms\ARCADE |
|
\Roms\ARCADE\shoot |
\Roms\ARCADE |
|
\Roms\ATARI2600 |
\Roms\ATARI |
|
\Roms\ATARI7800 |
\Roms\SEVENTYEIGHTHUNDRED |
|
\Roms\FC |
\Roms\FC |
|
\Roms\GB |
\Roms\GBC (I put it here because it's backwards compatible on GBC) |
|
\Roms\GBC |
\Roms\GBC |
|
\Roms\GBA |
\Roms\GBA |
|
\Roms\MAME2003PLUS |
\Roms\ARCADE |
|
\Roms\MAME2010 |
Don’t know yet |
|
\Roms\MD |
\Roms\MD |
|
\Roms\MS |
\Roms\MS |
|
\Roms\NEOGEO |
\Roms\NEOGEO |
|
\Roms\NGP |
\Roms\NGP |
|
\Roms\PCE |
\Roms\PCE |
|
\Roms\PS |
\Roms\PS |
|
\Roms\SFC |
\Roms\SFC (Note: Games worked after unzipping) |
|
\Roms\WS |
\Roms\WS |
Optional References / Resources Below
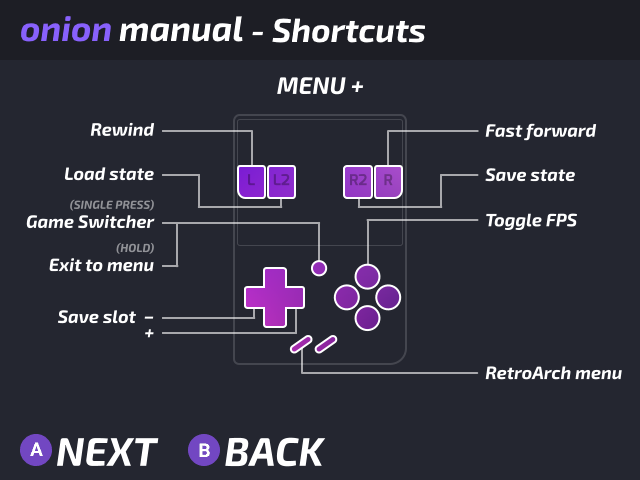
Onion Manual Displayed During Install
GitHub Docs (For More Help)
https://github.com/OnionUI/Onion/wiki
For those w/ 3D printers
1. Better Shoulder Buttons (Resin Printer Only)
STL Files: https://www.thingiverse.com/thing:5422756
Install Guide: https://vinitleedoes.notion.site/Better-Buttons-Installation-Guide-63e9eb7d93b2453a8c98bdce345ff37f
Discussion Thread: https://old.reddit.com/r/MiyooMini/comments/voi09o/i_designed_better_shoulder_buttons_new_version/
2. Screen Protector (Any 3D Printer)
STL Files: https://www.printables.com/model/240152-miyoo-mini-minimal-flippable-screen-protector
3. Ergonomic Grip
I recommend the MK2 which has retaining tabs on the front. Feels significantly great for use at home when you aren't on the go!
STL Files: https://www.thingiverse.com/thing:5463606/files
4. Better Grip Case V2
STL Files: https://www.printables.com/model/297997-miyoo-mini-better-gripcase-ver-2
GBA Save State Importing from Miyoo to Onion
Naming convention and paths are different on Miyoo and Onion. Just start by copying from Miyoo to Onion. Then rename the copies with *.state1 and *.state1.png.
renaming the copies from Miyoo to state0 and state0.png did not work for me on Onion OS so I started with state1 and state1.png in my examples.
Example below:
MiyooPath: \Roms\GBA\.gpsp_libretro
****************************************************
Some Game Title (USA).0.png
Some Game Title (USA).0.state

Onion Path: \Saves\CurrentProfile\states\gpSP
****************************************************
Some Game Title (USA).state1.png
Some Game Title (USA).state1
After doing this you can load the state you imported from the game w/ (Gameswitcher Button + Select Button) > Save States > State Slot (Choose slot 1). Then load state!
No Comments