KeePass Password Manager Tutorial
Introduction
I don't trust online password managers because they are closed source and companies have been hacked in the past. If you look up "lastpass breached" in Google you can see my point. Keepass is open source and offline. Why put your trust in a company when you can create and access the database yourself?
An honorable mention is bitwarden. They are also open-source and you have the option of hosting your own bitwarden server at home as an option. If you want to pay and are willing to trust a company and have your passwords encrypted on their cloud they would be your best bet.
Downloading Keepass
https://keepass.info/download.html
Get the Installer for Windows (2.45) aka KeePass-2.45-Setup.exe. After you get it install Keepass.
Recommended plugins (.plgx) to download:
Keepass has a variety of useful plugins listed here: https://keepass.info/plugins.html
I recommend the following below for now. Plugins always have a .plgx file extension.
- WebAutoType-v6.3.0.zip: https://sourceforge.net/projects/webautotype/files/
- YetAnotherFaviconDownloader.plgx: https://github.com/navossoc/KeePass-Yet-Another-Favicon-Downloader/releases
After you downloaded the necessary .plgx plugins. Copy or move them into the Plugins folder at C:\Program Files (x86)\KeePass Password Safe 2\Plugins.
1.1.1 Master Password
To start off you will be creating a master password which is the masterkey to access all your other passwords. This password should be long, easy remember, but difficult for a computer to guess. Please refer to the image below to see what I mean.

You can test theoretical passwords to see how strong they are here: https://howsecureismypassword.net/
These concepts are important to security so if you don't want to get pwned follow the advice above. Do not lose or forget your master password otherwise you will not be able to access your Keepass database ever again.
1.1.2 Creating your first .kdbx database
There are two ways to do this.
Option 1: Create a .kdbx file only meaning you only need your master password to unlock the database.
Option 2: Create a .kdbx file + a .key file. When you do this you need your master password + the .key file in order to unlock the database.
Typically you can choose Option 1 if you're confident in your master password. This is the easiest and simplest option.
I personally opted for Option 2. I store my .kdbx database in the cloud such as, Google Drive or Dropbox. I keep duplicates of my .key files locally (on my pc, on a usb stick, on a remote computer). That way if both my Google Drive and master password are compromised I am still safe because the hacker still needs the .key file to unlock it.
No matter the method do not lose your .kdbx and/or .key file!!!
If you lose these files your passwords are gone. Make copies and backups of your databases! Besides your main computer save it on your phone, the cloud, a flash drive, or etc.
Video 1a: Option 1 creating .kdbx only
Please note where you saved the .kdbx file...
Video 2a: Option 1 opening database w/ password
Video 1b: Option 2 Creating .kdbx + .key file
Please note where you saved the .kdbx and .key files...
Video 2b: Option 2 Opening database w/ password + .key file
1.1.2 Adding your first password entry
Right-click anywhere near the big box and click on "Add Entry..." The shortcut to add an entry is also CTRL+ i if that is faster for you.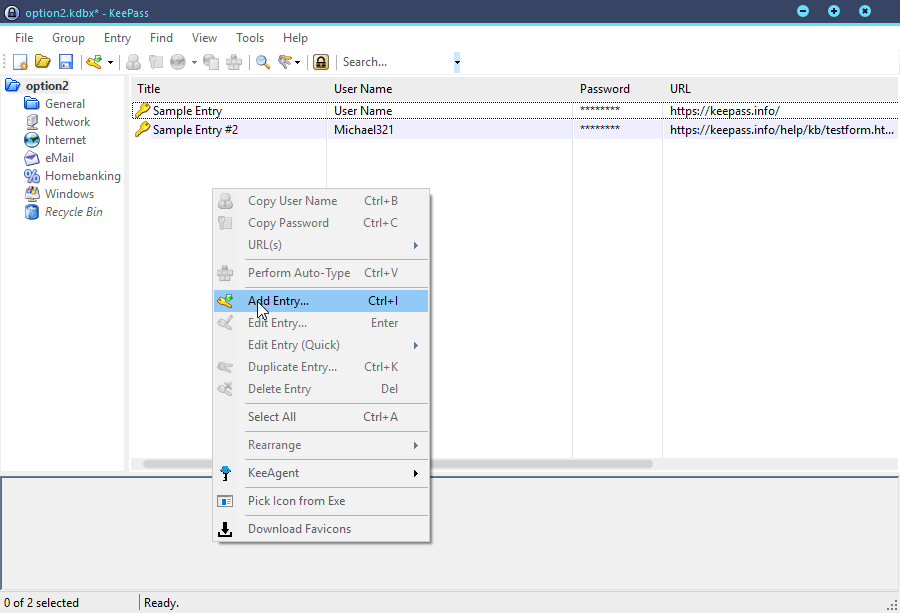
Give your entry a title. Fill out the username and login URL whenever possible. If you don't have a login URL or website URL to use then you can leave it blank. As you can see a password is already auto generated for you. You may use the generated password or manually enter in your own. And finally add any notes you need for reference.
In the video below I demonstrate how to play around with the password generator. Remember to Save when done. If you forget, don't worry it will ask you if you would like to save the database when you try to close.
1.1.3 Using your password manager to login (Auto-Typing)
Double-click on the URL next to the entry you want, to load the login page from your default browser. Alternatively, right click the URL and choose your preferred browser. (This is the reason why you should enter in your URL entries).

There are 3 ways to sign in. First make sure the cursor is blinking in the username field. Then you have 3 ways to login.
- Right-click and click on Perform Auto Type. Alternatively, press CTRL+V on keepass.
- Double-click on the username on to copy it. Then paste manually. Double-click on the password to copy. Then paste it manually. Note: copies stay in your clipboard for 12 seconds there's a bar that shows you how much time you have left.
- The most convenient method. If you installed the WebAutoType plugin and had the URL entry filled out. Simply press "CTRL+ALT+A" on the site you were trying to login.
A video below explains these 3 methods.
1.1.4 Modifying Auto-Type
Some websites have a different auto-typing sequence then the default of {USERNAME}{TAB}{PASSWORD}{ENTER}.
One variation you can try is {USERNAME}{ENTER}{DELAY 2000}{PASSWORD}{ENTER}
Demonstration of this variation in the video below.
Other variations maybe {USERNAME}{TAB}{TAB}{TAB}{PASSWORD}{ENTER} it is situational. Modify this sequence to your needs.
Congratulations you've mastered the basics!
2.1 Beyond the Basics and Customization!
2.1.1 Attaching a File
You can securely attach files to the database and keep it protected behind your master key!
This is basically done by creating / editing an entry and going to the advanced tab as shown below. You can store the file to your database then delete the original file. To retrieve it go back to your entry and the advanced tab. Then click on save and choose where to save it.
2.1.2 Groups and Recycle Bin
You can organize your database with groups! As for the recycle bin how it works is any entry you delete will end up in the recycle bin. It is only truly deleted when you delete it from the recycle bin. If you want to view all groups at the same time just type an empty entry in the search bar. Demonstration video below.
2.1.3 Password History
Keepass keeps a password history up to 10 revisions by default (you can change this). This video below demonstrates changing your password and retrieving your old passwords in case something went wrong.
2.1.4 Custom Icons
Lastly if you have the YetAnotherFaviconDownloader plugin you can customize your keepass icons! This only works on entries with URLs.
2.1.5 Advanced Auto SSH with Putty
WIP. Requires KeeAgent & Putty.
Temporary Tutorial Starts at 25m10s: https://www.youtube.com/watch?v=e6G8zHZlhv8&t=&t=25m10s
2.1.6 Cool Plugins
- ReadablePassphrase.1.2.1.plgx: https://github.com/ligos/readablepassphrasegenerator/releases
- Generates passwords like the correct horse battery staple principle mentioned in the beginning!
3.1 Mobile Apps
Don't know much for Apple iOS but heard StrongBox was good.
For Android, you can choose between "KeePassDX" or "Keepass2Android Offline" from the play store. KeePassDX has a nicer UI, but I only have experience with Keepass2Android Offline so there will only be a tutorial for that one.
Keepass2Android Offline Quick Tutorial
Some phones have advanced features where some apps or browsers ask you if you want to use keepass to sign in which is very convenient and much faster if they ask you this accept it! Some also have fingerprint unlock as an option as well for convenience so you may accept that as well.
If your phone doesn't have these advanced features there are still one way you can "Auto-Type."
1. Search for entry you want to login to.
2. Go back to the login page or tap on URL to open browser to get there.
3. Swipe down to see notifications. Tap on "Your entry. Entry is available through KP2A Keyboard".
4. Choose the Keepass2Android Offline keyboard.
5. Don't worry this is temporary and your default keyboard will revert back when you lock your database.
6. Go back to page you are trying to login.
7. Tap User & Tap Password on the mini keyboard below. Then to switch back to your original keyboard press the lockpad on the bottom right.
8. Instead of doing step 3 you could also copied user / pass from the notification bar (less secure).
Video of steps 1-8 below.
4.1 Other KeePass Variants
This tutorial only covered Keepass for Windows, because this is what I know... KeepassXC is the nicer looking one with cross-platform support you might miss out on the CTRL+ALT+A for autotype mentioned in 1.1.3 because it's powered by a Keepass plugin.
/u/SeerLite on reddit also gave a mention of https://keeweb.info/ and primarily uses that. I have no experience with it so I don't have much say.
5.1 Final Thoughts
Backup your damn database (.kdbx) file. Backup your .key file too if you created one!
Follow the 3-2-1 rule to prevent data loss.
Have 3 backups.
2 local (like desktop and phone).
1 Remote (Google Cloud / Dropbox).
No Comments